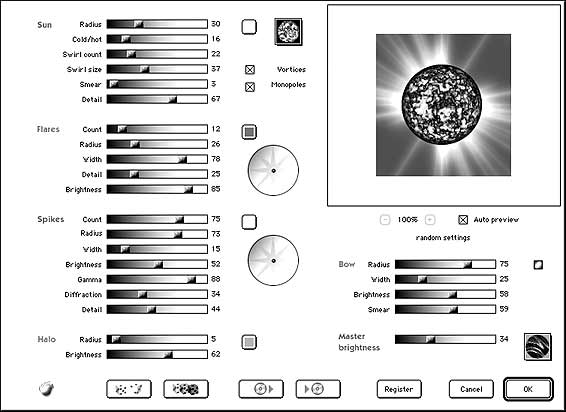
| |
|
SolarCell needs Photoshop 3.0 or an equivalent to present the image preview.
With some other paint programs, the filter will still work, but there will
be no preview.
Click the dice button a few times until you see something that you like.
Reposition the sun by clicking anywhere in the preview area.
Click OK. The progress bar will appear, and then your selection will
be replaced with a sun.
The controls
There are several controls for each of the five elements in a sun:
The sun
Flares
Diffraction spikes
The halo
The bow
...and a few other controls that affect the whole image. |
|

dice |
|
| 1. The sun |
|
|
|
The sun's disk is normally filled with fiery swirls,
but it can also be a flat color, or black like an eclipse.
Sun disk popup menu
lets you choose the sun disk type.
Color Button
This button lets you choose the sun's color.
The other disk controls only affect the "normal"
fiery-swirls disk:
Radius This is the size of the sun.
Cold/Hot Biases the sun's color toward cold (blue) or hot (red)
hues.
Swirl count Swirls in the lumpy pattern make it look more like
fire. This control set the number of swirls.
Swirl Size Set the size of the swirls. If the swirls are large
enough to overlap each other, interesting patterns appear. Beware, setting
this slider to a high value may take a very long time to produce a result.
Be patient, and a new graphic will soon appear.
Smear Larger values of this control produce longer streaks in
the swirls.
Detail Sets the overall scale of the lumpy pattern on the sun's
surface.
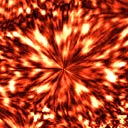
Monopoles and Vortices: You can have two types of swirls.
Monopoles are streaks radiating from a point. Vortices are spiral whirlpools. |
|

sun disk popup

color button
monopole

vortex |
|
| 2. Flares |
|
|
|
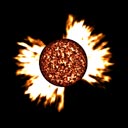
The flares are jets of flame shooting out from the edge of the sun,
Color button Sets the flares' color.
Count Sets how many flares there are.
Radius Sets the size of flares.
Width Sets the width of the individual flares.
Detail adjusts the lumpiness of the flares.
Brightness Adjusts the overall brightnes of the flares.
Orientation control Determines the clustering of the flares. It
works like the control for the diffraction spikes, explained above. |
|
sun with corona flares |
|
| 3. Diffraction spikes |
|
|
|
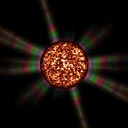
In real-life photographs, diffraction spikes appear around bright lights
due to a flaw in the lens. SolarCell draws these spikes in order to produce
the illusion of glaring brightness.
Color button The color button sets the color of the spikes.
Count Sets the number of spikes.
Radius Sets the spikes' length.
Width Sets the spikes' width.
Brightness Sets the overall brightness of the spikes.
Gamma Changes the contrast of the spikes to produce a softer or
harder appearance.
Diffraction For a more realistic appearance, this control lets
you add stripes of subtle colors across the spikes. When this control is
at zero, there are no stripes. At 100, the stripes are at their most prominent.
Diffraction Scale Sets the width of the color stripes.
Orientation control Adjusts the direction
and grouping of the spikes. It works like this:
The direction of the yellow line sets the direction that the spikes
will tend to line up along.
The distance of the blue dot from the center sets how much the spikes
will cluster together.
For example: if you place the blue dot in the center of the control,
the spikes will be dispersed all around the sun. If you drag the blue dot
all the way to the edge of the circle, then the spikes will all cluster
together at the same angle. Experiment and see. |
|
sun with spikes

orientation control |
|
| 4. The halo |
|
|
|
The halo is a bright circle of color around the sun. It helps to convey
the impression of brightness, and of air between the sun and the observer.
Color button Sets the halo's color.
Radius Sets the width of the halo. The radius is added to the
sun's size, so you can change the size of the sun and the halo will move
with it.
Brightness Adjusts the contrast of the halo, so it can taper off
slowly or rapidly. |
|
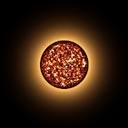
sun with halo |
|
| 5. The bow |
|
|
|
The bow is a rainbow around the sun. When it's bright, it produces a
fantasy-like effect. When dim, it lends a subtle variation of hue.
Radius This is the bow's radius, but it is not added to the sun's
radius. The bow radius can be less than the suns' radius. This way, the
bow can overlap the sun, which is sometimes useful.
Width The bow's width.
Bow brightness Sets the brightness.
Bow Blur Sets how much the colors blue together. When this control
is turn up high, the bow will have subtle colors like those seen around
the moon on a partly cloudy night.
The checkbox Reverses the order of colors in the bow. |
|
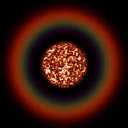
sun with bow
|
|
| 6. Other controls |
|
|
|
Dice This randomizes the settings. Click it as much as you want
to see different effects.
Random seed. This changes only the arrangement of all the random
elements, like the spikes, corona jets, and the sun disk surface.
MasterBrite This is the master brightness control for the whole
image.
Position of Sun Reposition the sun by clicking anywhere in the
preview area.
Glue mode: Lets you combine the sun with the underlying image
in various ways. Modes other than "normal" produce special effects.
"Composite" is useful: it makes the sun opaque, and everything
else brightens the underlying image.
Plus % and minus buttons: If the selected image
area is larger than the preview are, these buttons will let you zoom in
and out . You can also reposition the preview by dragging it around; your
cursor will turn into a hand.
Auto Preview: When this box is checked, the preview automatically
updates whenever you move any control. Turn it off if you want to save time.
Load preset: SolarCell comes with some presets, which are files
containing settings. To load one, click this button and browse for a preset
file.
Save preset: When you make an effect you like, click this button
to save the settings in a file.
Three more buttons:
OK: Applies the effect to your image.
Cancel: Dismisses the filter, and leaves the image unchanged.
Register: Allows you to type in a registration code. |
|

dice

random seed

glue mode

Load preset (top)
and
save preset |
|
Hints
If all four color controls -- sun, spike, halo, and corona -- are similar,
then results are realistic. Using vivid, unrelated colors produces a surreal
effect.
Updates and hints are online at http://www.flamingpear.com/solarcell.html
. |
|
|
|
Version History
Version 1.1e November 1999
Fixes strange bow colors that may appear when SolarCell is used with
some paint programs.
Version 1.1d July 1999
Improves compatibility with non-Photoshop paint programs.
Version 1.1c May 1999
Fixes a bug which sometimes caused the color buttons to crash.
Version 1.1b May 1999
Fixes a slow startup bug which caused SolarCell to run very slowly the
first time it was used.
Version 1.1 April 1999
The first public release. |
|
|
|
How to Register
SolarCell is time-limited evaluation software. If you would like to continue
using it beyond 15 days, you can register it for US$20 in these ways:
- Register online at http://order.kagi.com/?LB
, using a credit card.
Payment is accepted through Kagi, a fee processing
service. If you have questions about your order, you can contact Kagi's
customer service at support@kagi.com:
- Run the Register program that comes with SolarCell, which you can download
through http://www.flamingpear.com/downloads.html
.
- Order by phone with a credit card at +1 (510) 601-5244 during business
hours in the Pacific time zone. Kagi charges you an extra US$5 for this.
- Or, you can send a letter to...
Kagi
1442-A Walnut Street #392-LB
Berkeley, California, 94709-1405
USA
Your will get your code rapidly in an email message titled "Thanks
for your payment," or on a postcard if you have no email.
What to do with the code when you get it:
- From within your paint program, bring up the filter.
- There should be a button called "Register" near the "Cancel
" button. Click the "Register" button.
(If there is no "Register" button, it means somebody has already
input the code on this particular computer, and so you're already finished.)
- A new dialog box will appear. Type your code into a blank.
- Click OK.
.
- A thank-you message will appear. You're done. |
|
|
|
|
